How to create a blog with the Recess PHP Framework, Part 2
This is the second article in my Recess PHP Framework blog tutorial. The previous article demonstrates how to setup a basic blog that lists posts with links to individual posts. This tutorial will demonstrate how to create, update, and delete blog posts. The code in this tutorial picks up where the previous tutorial left off. If necessary, you can download the completed tutorial 1 code before reading further.
As I explained in my previous tutorial, [BLOG_ROOT] references the filesystem directory where you have installed the Recess PHP Framework; on my machine, [BLOG_ROOT] is ~/Sites/recess/. [BLOG_URL] references the URL with which you can access the blog application in a web browser; on my machine [BLOG_URL] is http://localhost/~joshlockhart/recess/.
Creating posts
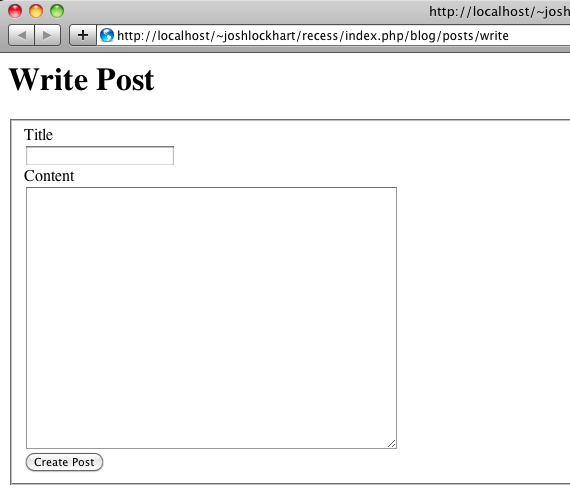
We require two controller actions to create a post. First, we need a PostsController::write() action to display an HTML form. This form will submit to the PostsController::create() action that will insert the new post into the database.
First, create the PostsController::write() action using this code:
/** !Route GET, posts/write */
public function write(){
    $this->post = new Post();
}
- Line 1: We can access this action with a GET request to
[BLOG_URL]index.php/blog/posts/write - Line 3: We provide a new empty Post to our view template
Let’s create the template for this controller action. Create [BLOG_ROOT]views/home/write.html.php. Open this file in a text editor and insert the following markup:
<html>
<body>
    <h1>Write Post</h1>
    <form action="<?php echo Url::action('PostsController::create'); ?>" method="POST">
        <fieldset>
            <label for="title">Title</label><br/>
            <input type="text" id="title" name="post[title]" value=""/><br/>
            <label for="content">Content</label><br/>
            <textarea id="content" name="post[content]" rows="20" cols="50"></textarea><br/>
            <input type="submit" value="Create Post"/>
        </fieldset>
    </form>
</body>
</html>
View the PostsController::write() action in a web browser at [BLOG_URL]index.php/blog/posts/write/. You should see an error. This is expected, because we have not yet created the PostsController::create() action which must exist since we reference this action with the Url helper in the PostsController::write() template. Let’s do that now.
Create the PostsController::create() action using this code:
/** !Route POST, posts */
public function create(){
    $post = new Post($this->request->post['post']);

    if( $post->save() ){
        return $this->redirect($this->urlTo('listPosts'));
    } else {
        return $this->ok('write');
    }
}
- Line 1: We can access this action with a POST request to
[BLOG_URL]index.php/blog/posts - Line 3: We instantiate a new post with data passed from our form
- Line 5: We attempt to save the new post to the database
- Line 6: If post saves, redirect to the
PostsController::listPosts()action - Line 8: If post does not save, render the
PostsController::write()template
There are several new features introduced in this action. First, we utilize the $this->request object. Every Recess controller provides easy access to the current request via $this->request. If you print_r($this->request); in a controller, you can see all of the information available. In the PostsController::create() action, we access a POST variable from $this->request->post, an array of all POST variables in the current request. Similarly, you could also access GET or PUT variables with $this->request->get['variable_name'] or $this->request->put['variable_name'], respectively.
We also use a controller helper method called $this->urlTo('action_name');. This helper method returns the full URL to a controller action, useful for redirects, etc, within a controller. Why not just hard-code a URL? Because routing information may change even if the controller actions do not (keep in mind this is a modular blog application that may be shared among Recess installations). This controller helper method allows us to maintain redirects while respecting controller action and route decoupling.
Before you try to create a new post, there is one small caveat. Currently, Recess requires you to create a template for every controller action, even if a template is not needed. So, go ahead and create an empty file at [BLOG_ROOT]views/home/create.html.php. The Recess developers are aware of this issue and will remedy this in a future update. Also, Recess does not yet have a “Flash” messaging feature similar to Rails or CakePHP. If you need to display a message to users, you will need to set a controller instance variable ($this->flash) before rendering a template; you can then check if this variable exists in the template and render a message if necessary.

Now you can create a new post at [BLOG_URL]index.php/blog/posts/write. When you submit the form, you should be redirected to the listing page and see your new post in the list.
Editing posts
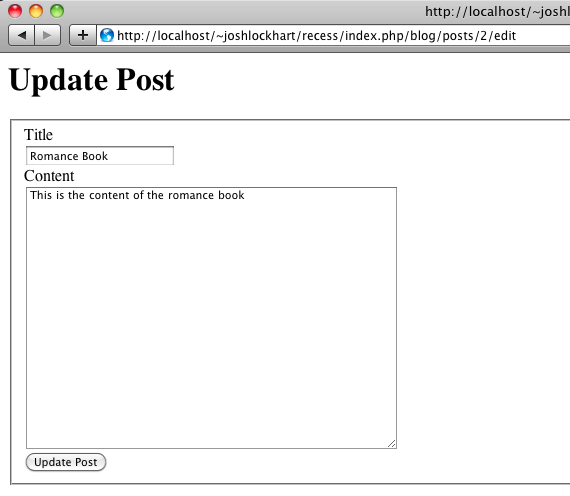
We also need two controller actions to edit a post; the PostsController::edit() action will display an HTML form populated with the current post’s details; the PostsController::update() action will update a post in the database with details passed from the HTML form.
First, create the PostsController::edit() action with this code:
/** !Route GET, posts/$id/edit */
public function edit($id){
    $post = new Post($id);

    if( $post->exists() ){
        $this->post = $post->find()->first();
    } else {
        return $this->redirect($this->urlTo('listPosts'));
    }
}
- Line 1: We can access this action with a GET request to
[BLOG_URL]index.php/blog/posts/1/edit - Line 2: We pass the dynamic route
$idparameter into the action - Line 3: We instantiate a Post with the specified ID
- Line 5: We check to see if the Post with the specified ID exists
- Line 6: If post exists, we pass the Post to the template
- Line 8: If post does not exist, we redirect to the listing view
Let’s now create the template for this action. Create [BLOG_ROOT]views/home/edit.html.php and insert the following markup:
<html>
<body>
    <h1>Update Post</h1>
    <form action="<?php echo Url::action('PostsController::update',$post->id); ?>" method="POST">
        <fieldset>
            <label for="title">Title</label><br/>
            <input type="text" id="title" name="post[title]" value="<?php echo $post->title; ?>"/><br/>
            <label for="content">Content</label><br/>
            <textarea id="content" name="post[content]" rows="20" cols="50"><?php echo $post->content; ?></textarea><br/>
            <input type="hidden" name="_METHOD" value="PUT"/>
            <input type="submit" value="Update Post"/>
        </fieldset>
    </form>
</body>
</html>
This markup is very similar to the write HTML form, but there are subtle differences. First, the form action is different, pointing to the PostsController::update() action instead of the PostsController::write() action. Second, although the form’s method is technically “POST”, we override this method using a hidden field with name “_METHOD” (the leading underscore and capitalization are important) and value “PUT” (capitalization is important). When Recess receives this POST request, it will treat it like a PUT request. We will cover this concept more in a later tutorial about RESTful routing in Recess.
We can now view this action in web browser at [BLOG_URL]index.php/blog/posts/1/edit; however, we receive an error. Because we reference the PostsController::update() action with the Url view helper, we must first create the PostsController::update() action. Let’s do that now.
Create the PostsController::update() action with this code:
/** !Route PUT, posts/$id */
public function update($id){
    $post = new Post($id);

    if( $post->exists() ){
        $this->post = $post->find()->first()->copy($this->request->put['post']);
        if( $this->post->save() ){
            //set a success message if necessary
        }
        return $this->redirect($this->urlTo('edit',$id));
    } else {
        return $this->redirect($this->urlTo('listPosts'));
    }
}
- Line 1: We can access this action with a PUT request to
[BLOG_URL]index.php/blog/posts/1 - Line 2: We pass the dynamic route
$idparameter into the action - Line 3: We instantiate a post with the specified ID
- Line 5: We check to see if the post with the specified ID exists
- Line 6: If post exists, we copy the new form data into the post
- Line 7: We attempt to save the post
- Line 10: We redirect back to the post’s edit form
- Line 12: If post does not exist, we redirect to the listing view
As I explained above, Recess currently requires a template for every controller action, even if a template is not needed. Create an empty template file at [BLOG_ROOT]views/home/update.html.php.

Now you can view [BLOG_URL]index.php/blog/posts/1/edit in a web browser. You should see an HTML form populated with the specified post’s details. If you edit the details and click the ‘Update Post’ button, you will see the same edit form with the new details.
Deleting posts
We only need one additional action to delete posts. Create the PostsController::delete() action with this code:
/**
 * !Route DELETE, posts/$id
 * !Route GET, posts/$id/delete
 */
public function delete($id){
    $post = new Post($id);

    if( $post->exists() ) $post->delete();
    return $this->redirect($this->urlTo('listPosts'));
}
- Line 2: We can access this action with a DELETE request to
[BLOG_URL]index.php/blog/posts/1 - Line 3: We can access this action with a GET request to
[BLOG_URL]index.php/blog/posts/1/delete - Line 5: We pass the dynamic route
$idparameter into the action - Line 6: We instantiate a post with the specified ID
- Line 8: We delete the post if it exists
- Line 9: We redirect back to the listing view
The only new feature with this action is that we use multiple routes. I have added the GET route only for convenience. Although this action does not require a template, Recess requires a blank template at [BLOG_ROOT]views/home/delete.html.php to avoid an error.
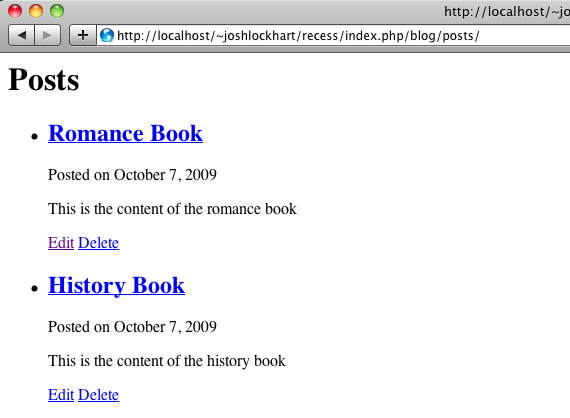
Finally, let’s add “Edit” and “Delete” links to the PostsController::listPosts() template for convenience. Update [BLOG_ROOT]views/home/listPosts.html.php to read:
<html>
    <body>
        <h1>Posts</h1>
        <ul>
            <?php foreach( $posts as $post ): ?>
            <li>
                <h2><a href="<?php echo Url::action('PostsController::show',$post->id); ?>"><?php echo $post->title; ?></a></h2>
                <p>Posted on <?php echo strftime("%B %e, %Y", $post->created); ?></p>
                <p><?php echo $post->content; ?></p>
                <p>
                    <a href="<?php echo Url::action('PostsController::edit',$post->id); ?>">Edit</a>
                    <a href="<?php echo Url::action('PostsController::delete',$post->id); ?>" onclick="return confirm('Are you sure?');">Delete</a>
                </p>
            </li>
            <?php endforeach; ?>
        </ul>
    </body>
</html>

Now when you view [BLOG_URL]index.php/blog/posts in a web browser, you can click “Edit” or “Delete” beside each post to edit or remove the post.
In summary
This article demonstrates how to create CRUD (create, update, and delete) actions in the posts controller. You can now view [BLOG_URL]index.php/blog/posts/ in a web browser to view posts, create posts, edit posts, and delete posts. The next article in this series will explore model relationships by adding comments and tags to our blog posts. Stay tuned!
Download the final project
This file contains the Recess Framework and all controllers, models, and views for this tutorial.
Download (ZIP, 342 KB)


Comments
Oladipo Olasemo
How do I post data to recess with JSON???kiran
Hi,First time @ recess, @ The time of Adding and updating data following eror occured
Fatal error: Exception thrown without a stack frame in Unknown on line 0
Tom
I must say those 3 posts on how to create a blog with recess are really helpfull.I get an error though when trying to redirect after editing a post, and i can't figure out what it is.
- The error is :"Unable to provide desired content-type. Does the view "home/update" exist?"
- From the file : [BLOG_URL]\recess\recess\framework\DefaultPolicy.class.php
- My question is what is this var for : "$response->meta->viewsPrefix" ? and how does it work?
khurram
Hi,
I am getting this error while submitting new post.
SQLSTATE[HY000]: General error: 1364 Field 'id' doesn't have a default value
Regards,
Leave a comment