How to fix 404 redirects after a new site launches
Redirecting URLs from an old site to a new one is one of the most important (and often neglected) tasks when launching a new website. It's crucial to retain the search engine value that the old site has generated over the years and ensure visitors to the new site aren't regularly seeing an error if they go to a link they found to the site using its old URL structures.
NMC works hard to create as many redirects as possible before a new site launches. We do this through a combination of:
- Including the creation of redirects during any automated content import.
- Manually creating redirects whenever content is moved over by hand.
- Going through the top pages of search results for the website and ensuring any top pages have redirects.
- Looking at Google Analytics and ensuring top pages have redirects.
It's really hard to get every single redirect, however, so after a site launches, we also go through the following process to ensure all of the URLs for old content are redirected to the appropriate pages on the new site.
Step 1: Logging 404 Errors
NMC has worked with a number of tools to handle redirects, but our favorite plugin for WordPress sites is Redirection. The plugin is:
- Lightweight
- Well maintained
- Allows for exporting/importing redirects in bulk
- Reliable
- Commonly used
- Supports regular expressions.
The plugin also logs any 404 errors, which makes it easy to figure out which redirects may have been missed after a website has been launched.
The process we're outlining in this post assumes you're using the Redirection plugin, but you can follow a similar process using any plugin or method that logs 404s.
Step 2: Exporting 404 Errors and Sorting By Priority
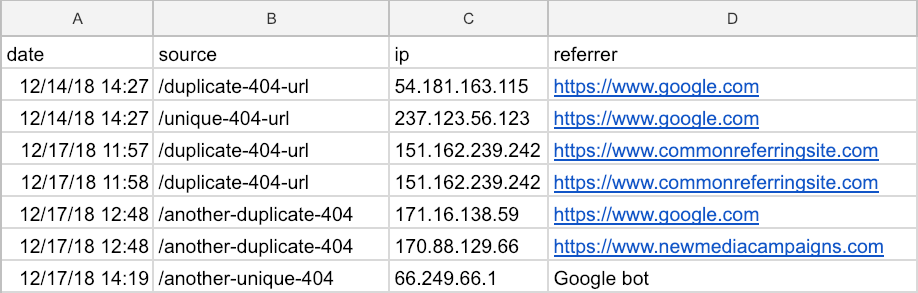
A few days after a new site has launched, export a list of any 404s that have occurred. If you use Redirection, the CSV export will have four columns:
- Date - The date the 404 occurred
- Source - The URL that caused the 404
- IP - The IP address of the user that saw the 404 error
- Referrer - Where the user came from that saw the 404
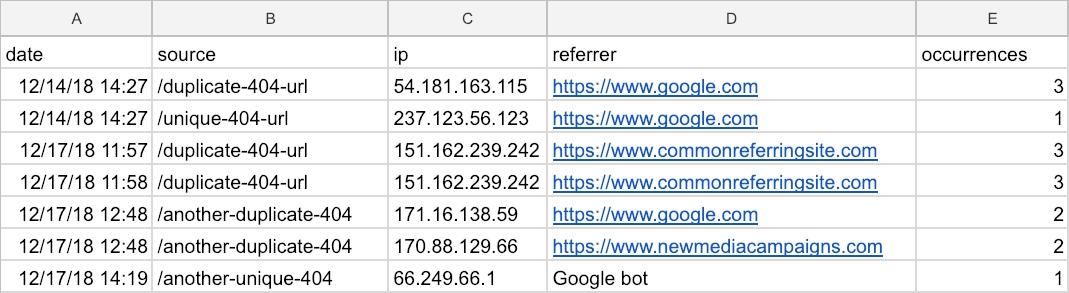
Once you have the list of 404 errors, add a fifth column called "occurrences" and in cell E2, add the following formula:
=COUNTIF($B:$B,B2)
Then copy and paste that formula into all the rows in Column E. That will give you a count of the number of times each 404 error occurred.
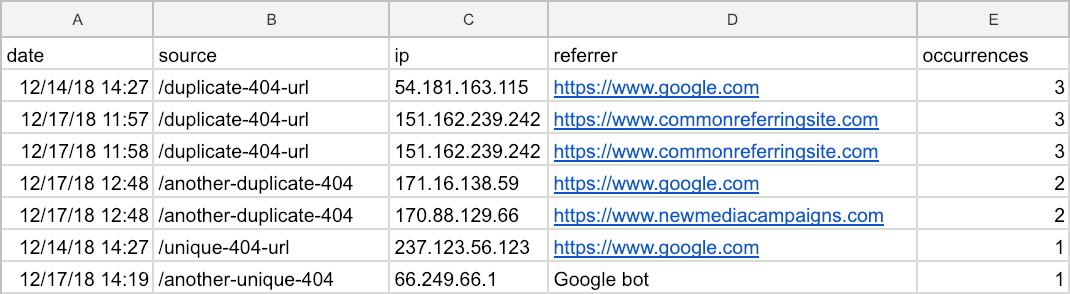
Once you have a list of all the redirects and a count of how many times they've occurred, sort the spreadsheet by Column E from largest to smallest. Here are guides for doing that in Google Sheets and Microsoft Excel.
The resulting spreadsheet will look something like this.
Step 3: Adding Redirects in Order of Priority
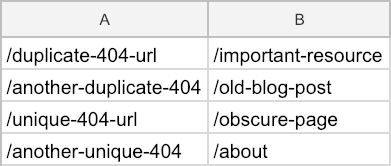
Create a new spreadsheet in whatever format is needed to import the redirects. For Redirection, it's a simple CSV with Column A being the Source URL and Column B being the Target URL.
Starting at the top of the list, find the page on the current site that best reflects where the old URL should redirect. The resulting spreadsheet will look something like this.
View a sample spreadsheet of redirects data, including the occurrences column.
Step 4: Import the Redirects. Rinse and Repeat.
Export the redirects you've created, usually as a CSV file, and import them into your redirects plugin.
In a week or two, go back to step 2 and run through the process again. You'll want to filter the data by date first and remove all the errors that occurred before you went through this process the first time. You should see fewer and fewer errors each time!


Comments
James J harper
Most companies do not pay attention to 404 errors. Least they know that these simple errors can affect their site ranking as well. Especially, because 404 errors can increase the bounce rate. So, instead of affecting it negatively, add some links to your 404 page such as home page, trendy blog posts, highly valuable products, HTML sitemap, and other related links.Leave a comment