
Building a Property Listing
How we build a custom, easy-to-manage buildings and sites tool.
We do a lot of work with economic development groups that need to list available area real estate on their site. Often they'll have an agreement with a third-party tool like Loop.net that allows them to embed a search tool for their visitors. These work great, but carry a high subscription fee and require maintaining information on a second service.
Recently we worked with the economic development group for the town of Wendell, North Carolina along with our agency partner Liaison Design Group. They wanted to make the available buildings and sites around Wendell available on the site in a format that was easy to browse and search. Liaison designed an excellent map and listing page that made it possible to see results on both a map and in a listing below. Liaison also worked with Wendell to determine the appropriate fields to display on individual property listing screens.
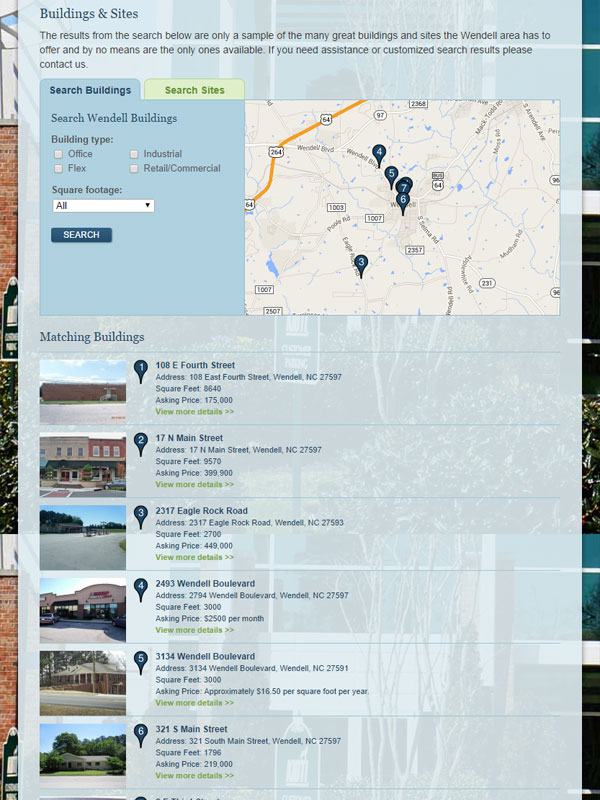
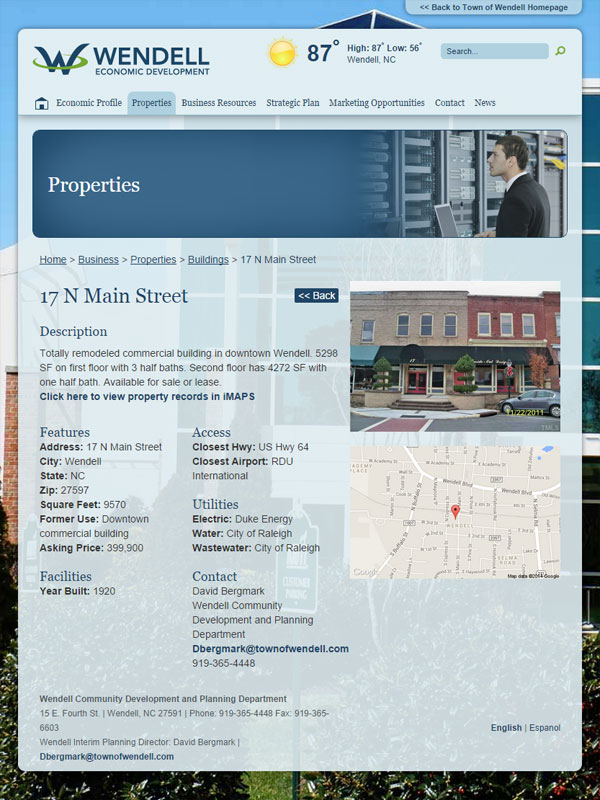
You can see the listing live on the Wendell Properties page here.
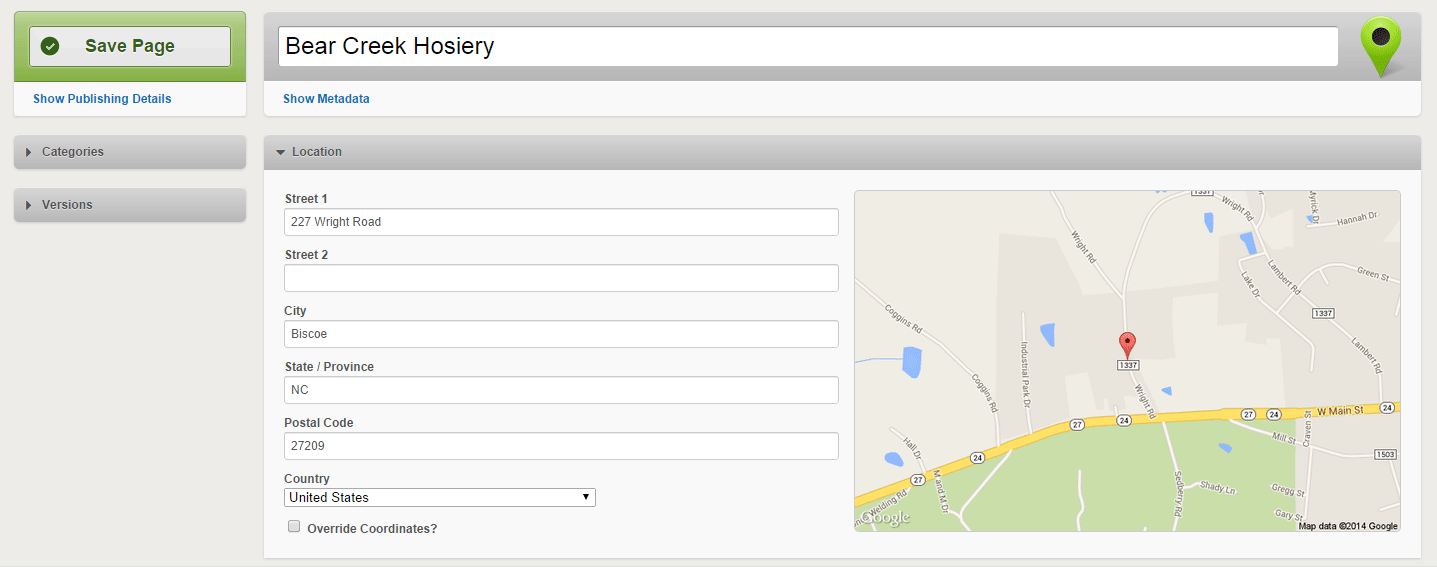
Once the design and the data structure was set, we began thinking about how to architect the project so it would run smoothly on a CMS. We use HiFi which allows for extensive customizability, but other CMS tools like Craft, ExpressionEngine, Wordpress or Drupal could work similarly. We set up the custom fields to run on the HiFi Location type, so it would be easy to add in address information. HiFi automatically geocodes addresses and stores the coordinates on the location object which was an added bonus. This made managing the properties really easy for the site administrators:
So in the CMS we had a collection of location objects that could be easily managed by editors. We used those data to display all search results in the listing as simple html. In addition to just showing the information we needed, we also used data-properties on each listing object so that we could access all of the needed information with jQuery. The listing markup looked like this:
<div class="property-item" data-object='{{ property|json_encode }}' data-num="{{ loop.index }}" data-color="{{ color }}" data-title="{{ property.title }}" data-url="{{ property.url }}">
    [LISTING INFORMATION]
</p>
One nice tool we found while working on this project were the custom pins that Google will generate using their charting API. This allowed us to use numbered pins on the map that matched the numbered pins on the listing. All that was needed was a correctly formatted url:
<img class="marker" width="21" height="34" src="http://chart.apis.google.com/chart?chst=d_map_pin_letter&chld={{ loop.index }}|{{ color }}|ffffff" alt="{{ loop.index }}">
Once we had the listing on the page, all that was needed was to loop through each result and display it as a marker on the map. The javascript below shows how this was accomplished. We used the center of Wendell as the origin of the map.
google.maps.visualRefresh = true;

var map = new google.maps.Map(document.getElementById("map-canvas"), {
    center: new google.maps.LatLng(35.3614511, -79.79683449999999),
    zoom: 11,
    mapTypeId: google.maps.MapTypeId.HYBRID,
    panControl: false,
    zoomControl: true,
    streetViewControl: false,
    mapTypeControl: false,
    zoomControlOptions: {
        style: google.maps.ZoomControlStyle.SMALL,
        position: google.maps.ControlPosition.RIGHT_TOP
    }
});

function addMarker(lat,lng,num,color,title,url){
    var latLng = new google.maps.LatLng(lat, lng);
    var marker = new google.maps.Marker({
        position: latLng,
        icon: 'http://chart.apis.google.com/chart?chst=d_map_pin_letter&chld=' + num + '|' + color + '|ffffff',
        title: title,
        url: url,
        map: map
    });
    google.maps.event.addListener(marker, 'click', function() {
        window.location.href = this.url;
    });
}

var i = 1;
$('.property-item').each(function(){
    var $this = $(this);
    var obj = $this.data('object');
    var num = $this.data('num');
    var color = $this.data('color');
    var title = $this.data('title');
    var url = $this.data('url');
    addMarker(obj.latitude,obj.longitude,num,color,title,url);
    i++;
});
Because we added all of the data-properties, it was easy to get all of the needed CMS data from each list item so that the marker pins could be generated.
This solution ended up being fairly easy to implement because of its clean setup. As an added benefit it is very easy to maintain as the listed properties get sold and new ones go up for sale.
Related Posts

Building a jQuery Interactive Map


Leave the first comment